One way to fill borer holes is to use a putty knife or spatula to apply wood filler into the hole. You can also use a toothpick or other sharp object to help push the filler into small spaces. Another method is to use caulk.
Borer holes, whether they are in wood, drywall, or other materials, can be unsightly and need to be properly filled to maintain the appearance and structural integrity of surfaces. In this guide, we will walk you through the step-by-step process of filling borer holes correctly. By following these instructions and using the right materials, you can achieve seamless and professional-looking results.
First, cut the tip of the caulk tube at a 45-degree angle. Next, insert the tube into the caulking gun and apply pressure to release the sealant. Then, run the bead of caulk along the length of the hole.
- Acquire a putty knife and some wood filler that is the same color as the surrounding wood
- Use the putty knife to scoop out a small amount of filler onto its blade
- Gently insert the blade into the borer hole, and deposit the filler into it
- Use your finger to smooth over the top of the hole so that the filler is level with the surface of the wood
- If you are filling a large hole, allow the filler to dry for several hours before proceeding to step 5b
- If you are filling a small hole, proceed directly to step 5b
- Once the filler has dried (or if you are filling a small hole), use sandpaper to gently sand down any rough edges around the filled area until it is flush with the rest of the wood surface
Tools and Materials Needed for the Job
Before you begin, gather the following tools and materials:
- Putty knife or a filling knife
- Sandpaper (fine grit)
- Filling material appropriate for the surface type (wood filler, spackling paste, etc.)
- Paint or finish that matches the surface color
- Clean cloth for wiping off excess filler
Inspection and Preparation
Before starting the filling process, perform the following steps:
Checking the Size and Depth of the Bore Holes
Inspect the bore holes to determine their size and depth. This information will help you choose the right filling material and estimate the quantity needed.
Cleaning the Area Around the Bore Holes
Ensure the area around the boreholes is free from dust, debris, and loose particles. Use a clean cloth or a brush to clean the surface properly.
Prepping the Surface for Filling
For better adhesion, slightly roughen the edges of the boreholes using sandpaper. This step allows the filling material to grip the surface more effectively.
Choosing the Right Filling Material
Selecting the appropriate filler is crucial for achieving a long-lasting and seamless repair.
Different Types of Fillers for Different Materials
Wood fillers work best for wooden surfaces while spackling paste is more suitable for drywall. Consider the material you are working with and choose the corresponding filler.
Considerations for Indoor and Outdoor Applications
If the borer holes are indoors, choose a filler that is designed for indoor use. For outdoor applications, use a filler that is weather-resistant and durable to withstand the elements.
Finishing Touches
Matching the Filler Color to the Surrounding Surface
To make the repaired areas blend with the rest of the surface, ensure the filler color closely matches the surrounding area.
Applying Paint or Finish to Blend the Patched Areas
After the primer has dried, apply paint or finish that matches the surface to achieve a seamless and invisible repair.
Tips and Tricks
Common Mistakes to Avoid When Filling Bore Holes
Be cautious of overfilling the holes, as excessive filler can be difficult to sand down. Additionally, avoid leaving air pockets in the filler, as they can lead to cracking over time.
Techniques for Seamless Results
Practice feathering the edges of the filler to blend it smoothly with the surface. This technique helps in achieving an almost invisible repair.

Credit: www.markethouserestorations.com
How to Fill Woodworm Holes in Beams
If you have woodworm holes in your beams, don’t panic! These little pests aren’t as destructive as they seem, and with a little bit of elbow grease, you can get rid of them for good.
Here’s how to fill woodworm holes in beams:
- Start by vacuuming up any loose dust or debris around the hole. This will help to clear away anything that might be blocking the hole and making it difficult to fill.
- Next, use a putty knife or another sharp object to widen the hole slightly. This will give you a bigger surface area to work with when it comes time to fill it in.
- Once the hole is widened, begin filling it in with wood filler. You can find this at most hardware stores – just make sure to get one that’s meant for indoor use (since your beams are likely located inside your home).
- Use a putty knife or your fingers to smooth out the filler so that it’s level with the rest of the beam. Allow it to dry completely before moving on.
- To finish things off, sand down the area around the filled-in hole until it’s smooth once again. You may need to use a finer grit sandpaper for this step if there are any rough edges remaining from widening the hole earlier on.
How to Fill Woodworm Holes in Furniture
If you have woodworm holes in your furniture, don’t panic! These little pests are relatively easy to get rid of with the right treatment. Here’s what you need to know about filling woodworm holes in furniture:
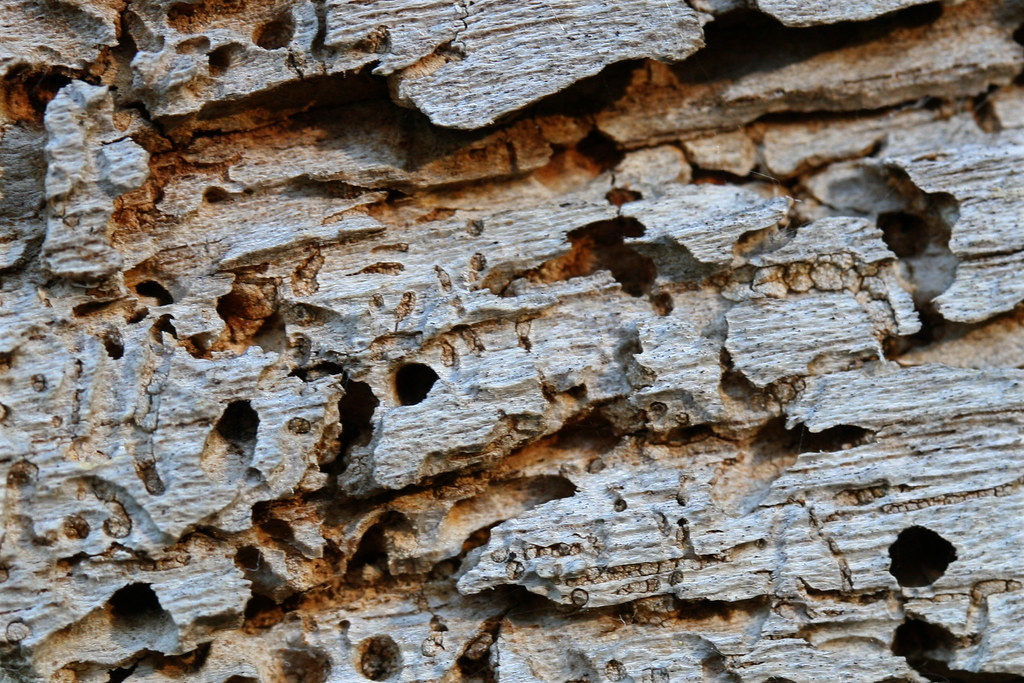
What are Woodworm Holes? Woodworm holes are tiny (usually less than 1/8 inch in diameter), round tunnels that are bored into wood by larvae. The most common type of wood-boring insect in the United States is the powderpost beetle, which attacks both hardwoods and softwoods.
How do I know if I have Woodworm? One telltale sign of woodworm is the presence of small, round exit holes in your furniture. If you see these holes, it’s a good indication that there are larvae present and active inside the wood.
You may also see sawdust-like frass near the holes, which are actually made up of bits of chewed-up wood. Treating Woodworm Holes in Furniture To treat woodworm holes, you’ll need to use an insecticide that contains borate.
This can be found at most hardware stores or online. Simply mix the borate with water according to the manufacturer’s instructions and apply it to the affected areas using a paintbrush or sprayer. Be sure to follow all safety precautions on the product label when using any insecticide.
Once you’ve treated the area, seal off any remaining exit holes with putty or caulk so that new larvae cannot enter. Allow everything to dry completely before using or handling your furniture again.
Step-by-Step Guide
Step 1: Selecting the Appropriate Filler
Based on the material and location of the boreholes, choose the right filler as per the previous instructions.
Step 2: Applying the Filler to the Bore Holes
Using a putty knife or a filling knife, carefully apply the filler into the bore holes. Ensure the holes are completely filled without any air gaps.
Step 3: Smoothing and Leveling the Filled Areas
Once the holes are filled, use the putty knife to level the surface and make it flush with the surrounding area. Smooth out any excess filler for a seamless finish.
Step 4: Allowing the Filler to Dry
Follow the manufacturer’s instructions regarding the drying time of the filler. Allow sufficient time for the filler to dry and cure properly.
Step 5: Sanding and Priming the Filled Areas
After the filler has dried, use fine-grit sandpaper to smooth the patched areas. Wipe off any dust, and apply a primer if needed before painting or finishing.
How Do You Fill Wood Borer Holes?
There are a few ways that you can fill wood borer holes, depending on the size of the hole and what type of filler you have available. If the hole is small, you can simply use some wood glue to fill it in. For larger holes, you may need to use a putty or epoxy.
First, clean out any debris from the hole with a vacuum or toothpick. Next, mix your filler according to the instructions and apply it to the hole. Allow it to dry completely before sanding it down so that it is flush with the rest of the wood surface.
What’s the Best Way to Fill Screw Holes?
There are a few different ways that you can fill screw holes, depending on your needs. If you just need to cover up the hole, then using putty or caulk is usually sufficient. If you need to add strength back into the joint, then using wood glue or epoxy is a better option.
If you’re just trying to cover up the hole, then putty is probably the easiest option. You can buy pre-mixed putty at most hardware stores, or mix your own with sawdust and glue. Just pack the putty into the hole until it’s level with the surface, and then sand it smooth once it dries.
Caulk is another good option for covering up screw holes. It’s easy to apply and dries quickly, but doesn’t have much strength so it’s not ideal for structural repairs. Use a utility knife to cut off the tip of the caulk tube at a 45-degree angle, and then squeeze out a bead of caulk into the hole.
Use your finger to smooth it out, and then wipe away any excess with a damp cloth. If you need to add some strength back into the joint, then using wood glue or epoxy is a better option. First, remove any old glue or residue from inside the hole with a wire brush or drill bit.
Then mix up some wood glue according to the manufacturer’s instructions and fill the hole with it using a small applicator bottle or syringe. clamping something over top of the repair while it dries will help to hold everything in place while the glue sets up. Or, for an even stronger repair, mix up some two-part epoxy according to its instructions and use that instead of wood glue.
What to Use to Fill Holes in Exterior Wood?
Holes in exterior wood can be filled with a variety of materials, depending on the size and location of the hole. For small holes, putty or caulk may be sufficient. Larger holes may require a patch made from a piece of scrap wood.
The patch can be attached with screws, nails, or adhesive. If the hole is located in a visible area, the repair should be sanded and painted to match the surrounding surface.
Can You Fill Drill Holes With Wood Filler?
Yes, you can fill drill holes with wood filler. The best way to do this is to first drill a pilot hole slightly smaller than the diameter of your desired final hole. Next, use a chisel or utility knife to enlarge the pilot hole until it’s just big enough to accommodate the wood filler.
Finally, insert the wood filler into the hole and use a putty knife to smooth it out.
How to Fill Borer Holes in Furniture
If you have furniture that’s been infested with borers, you know how difficult it can be to get rid of these pests. Not only do they damage your furniture, but they can also be a health hazard. Luckily, there are a few things you can do to get rid of borers and protect your furniture from future infestations.
One of the best ways to get rid of borers is to fill their holes with wood filler. Wood filler is a substance that hardens when it dries, making it perfect for filling in borer holes. You can find wood filler at most hardware stores.
To use wood filler to fill borer holes, start by sanding down the area around the hole. This will help the filler adhere better to the surface of the furniture. Next, apply the filler into the hole using a putty knife or your fingers.
Make sure to pack it in tightly so that no gaps remain. Allow the filler to dry completely before sanding it down until it’s flush with the rest of the surface. Once you’ve filled all of the borer holes in your furniture, you’ll want to take steps to prevent future infestations.
One way to do this is by treating your furniture with an insecticide designed specifically for borers. You can find these products at most home improvement stores or online retailers specializing in pest control products. Another way to prevent borers is by regularly inspecting your furniture for signs of infestation and treating any affected areas immediately.
How to Fill Borer Holes Before Painting
If you’re painting your home and notice borer holes, don’t panic! These small holes are typically found in wood that has been exposed to the elements for an extended period of time. While they may look unsightly, filling borer holes before painting is a relatively easy process.
To fill borer holes, start by sanding down the area around the hole until it’s smooth. Then, use a putty knife to apply a generous amount of wood filler or spackle into the hole. Once the filler is in place, use your putty knife to level it off with the surrounding surface.
Allow the filler to dry completely before sanding it smooth and continuing with your paint job!
Frequently Asked Questions
Q: Can I fill bore holes myself, or should I hire a professional?
A: Filling small boreholes can be a DIY task if you follow the steps outlined in this guide. However, for larger or more extensive repairs, it’s advisable to seek the expertise of a professional.
Q: How long does it take for the filler to dry?
A: The drying time can vary depending on the type of filler and environmental conditions. Refer to the manufacturer’s guidelines for accurate drying times.
Q: What should I do if the filled areas are not blending with the rest of the surface?
A: If the patched areas are not blending well, try adjusting the filler color, feathering the edges more effectively, or seeking advice from a professional.
Key Takeaway
Filling borer holes correctly requires careful inspection, choosing the right filler, and precise application. By following the steps in this guide and implementing the tips provided, you can achieve seamless results and restore the aesthetic appeal of the affected surfaces. Always remember to choose appropriate materials and take your time to ensure a successful and long-lasting repair
Related Articles:
Insect Invasion: Threat to Utah’s Fir Forests
 Dr Ahsanur Rahman, PHD
UK Forests Collapse Imminent: Act Now Against Climate!
 Dr Ahsanur Rahman, PHD
Lightning Strikes Threat: Boreal Fires Jeopardize Carbon
 Dr Ahsanur Rahman, PHD


